
Free Pumpkin Knitting Pattern: A Halloween Treat Basket

Add a little handmade magic to Halloween with this free pumpkin knitting pattern. This little treat basket features a smiling pumpkin lid topped with a witchy hat and leafy details—perfect for holding wrapped chocolates or small treats.
Adapted from my Easter Chicken Chocolate Basket, this version keeps the original knitted basket and swaps the chicken lid for a playful pumpkin. Make one for your Halloween display or fill it with treats for a sweet handmade gift.
Skill Level
Intermediate
Techniques
Circular cast-on
Increase and decrease stitches
German's short row
Gathered bind-off
Simple embroidery skill
Finished Size
9 cm / 3 ½ in (height)
Needles
US 3 (3.25 mm)
Gauge
26 sts x 37 rows = 4 x 4 in / 10 x 10 cm
Notions
A tapestry needle
Yarn
Estelle Eco Tweed DK - 50% Organic Wool, 25% Organic Alpaca, 25% Cellulosic Viscose (350m / 382 yds - 100 g)
Yarn Amount
C1 (Off-white): 5 g
C2 (Green): 5 g
C3 (Orange): 5 g
C4 (Brown): 2 g
Other Materials
Toy stuffing
Extra yarn or embroidery floss for the face - black
Abbreviations
CO | cast on | k2tog | knit 2 stitches together |
rnd(s) | round(s) | k3tog | knit 3 stitches together |
st(s) | stitch(es) | ssk | slip, slip, and knit |
k | knit | RLI | right-lifted increase |
p | purl | LLI | left-lifted increase |
DS | double stitch | BOR | beginning of the round |
Note - Free Pumpkin Knitting Pattern: A Halloween Treat Basket
This pumpkin basket is a Halloween variation of my Easter Chicken Chocolate Basket. It uses the same basket pattern, with a smiling pumpkin lid topped with a witchy hat and leafy details.
The basket and pumpkin lid are worked seamlessly in the round, beginning with a circular cast-on and finishing with a gathered bind-off. Short rows give the pumpkin its gently tilted, asymmetrical shape. The lid is lightly stuffed, then shaped with yarn to define the pumpkin sections and finished with an embroidered face.
Chocolate Basket
Using C1, circular CO 12 sts. Knit in the round.
Rnd 1: knit all sts.
Rnd 2: [k2, LLI] to end. (18 sts)
Rnd 3: knit all sts.
Rnd 4: [k3, LLI] to end. (24 sts)
Rnd 5: knit all sts.
Rnd 6: [k4, LLI] to end. (30 sts)
Rnd 7: knit all sts.
Rnd 8: [k5, LLI] to end. (36sts)
Rnd 9: knit all sts.
Rnd 10: [k6, LLI] to end. (42 sts)
Rnd 11: knit all sts.
Rnd 12: [k7, LLI] to end. (48 sts)
Rnd 13: knit all sts.
Rnd 14: [k8, LLI] to end. (54 sts)
Rnd 15: knit all sts.
Rnd 16: [k9, LLI] to end. (60 sts)
Rnd 17-21: k 5 rnds
Rnd 22: [k2tog, k4] to end. (50 sts)
Rnd 23-28: k 6 rnds
Rnd 29-36: change to C2, k 8 rnds.
Rnd 37: [k2tog, k3] to end. (40 sts)
Rnd 38: knit all sts.
Rnd 39: [k2tog, k2] to end. (30 sts)
Rnd 40: knit all sts.
Rnd 41: [k2tog, k1] to end. (20 sts)
Rnd 42: knit all sts.
Rnd 43: k2tog for all sts. (10 sts)
Gathered bind-off.

Push the top of the work inward so it forms a basket shape. To secure it, thread the yarn tail on the opposite side of the opening, then weave it around the center, following either the cast-on stitches or the gathered stitches. Pull gently to close and fasten.


Knitting the Pumpkin lid
Using C3, circular CO 12 sts. Knit in the round.
Rnd 1: knit
Rnd 2: [k2, LLI] to end. (18 sts)
Rnd 3: knit
Rnd 4: [k3, LLI] to end. (24 sts)
Rnd 5: knit
Rnd 6: [k4, LLI] to end. (30 sts)
Rnd 7: knit
Rnd 8: [k5, LLI] to end. (36sts)
Rnd 9: knit
Rnd 10: [k6, LLI] to end. (42 sts)
Rnd 11-16: k 6 rnds
Rnd 17: [k2tog, k5] to end. (36 sts)
Rnd 18: Knit all sts.
Rnd 19: [k6, LLI] to end. (42 sts)
Rnd 20: Knit all sts.
Rnd 21: [p1, RLI, k6, LLI] to end. (54 sts) Rnd 22-25: [P1, k8] to end. (4 rnds)
Continue to knit the Short Row
Note: The short rows create an intentionally asymmetrical pumpkin, with one side fuller and taller than the other. Maintain this gentle tilt in the next shaping section.
Short Row 1 (RS): Work in pattern to the last 5 sts, turn.
Short Row 2 (WS): Make a DS, work in pattern to the last 5 sts, turn.
Short Row 3 (RS): Make a DS, work in pattern to 3 sts before the previous DS, turn.
Short Rows 4–8: Repeat Short Row 3 another 5 times, alternating WS and RS rows, ending after a WS row.
Short Row 9 (RS): Make a DS, work in pattern to BOR. As you encounter each DS, work it together as one stitch; work either k2tog or p2tog as required to maintain the pattern.
Continue to knit in the round
Rnd 1: Work in pattern for one rnd. As you encounter each DS, work it together as one stitch, k2tog or p2tog as required to maintain the pattern.
Rnd 2: [p1, k2tog, k4, ssk] to end. (42 sts)
Rnd 3: knit all sts.
Rnd 4: [p1, k2tog, k2, ssk] to end. (30 sts)
Rnd 5: knit all sts.
Rnd 6: [p1, k2tog, ssk] to end. (18 sts)
Cut C3. Push the bottom inward to form the underside of the lid. Lightly stuff between the knitted layers, keeping the underside concave and the top gently domed.


Rnd 7: Using C2, knit all sts.
Rnd 8: k3tog for all sts. (6 sts)
Rnd 9-13: k 5 rnds.
Gather bind off.

Shaping the Pumpkin
Use a length of matching yarn and a tapestry needle to define the pumpkin sections. A contrasting yarn is used in the photos for visibility.
Step 1: Secure the yarn at the center of the underside of the pumpkin lid.


Step 2: Bring the needle out at the top of the pumpkin, close to the base of the stem. Lay the yarn down the outside, following a purl column between two knitted sections. Insert the needle approximately 1 cm above the lower edge along the same column, bringing it through to the underside. Gently pull the yarn to form a groove, using your fingers to shape the stuffing into rounded sections.


Step 3: Wrap the yarn around the lower edge and reinsert the needle at the same point from the outside. Pass the needle through the stuffing, keeping the yarn concealed between the knitted layers, and bring it out at the base of the stem.


Step 4: Repeat Steps 2–3 for each remaining purl column, keeping the tension even while preserving the pumpkin’s asymmetrical shape. Bring the yarn to the underside, make a small stitch, and pass the needle through the resulting loop to secure. Weave in the end, then gently adjust the pumpkin sections into shape.


Adding the Face
Using black yarn and a tapestry needle, embroider the face on the front of the pumpkin, referring to the photos for placement.
Step 1: Embroider two small eyes using a few short stitches worked closely together. Keep the tension gentle to avoid puckering the knitted fabric.
Step 2: Below the eyes, embroider a wide, zigzag smile using short straight stitches, with the corners slightly raised.
Step 3: Secure the yarn and weave in the ends between the knitted layers, keeping them concealed from the underside of the lid.


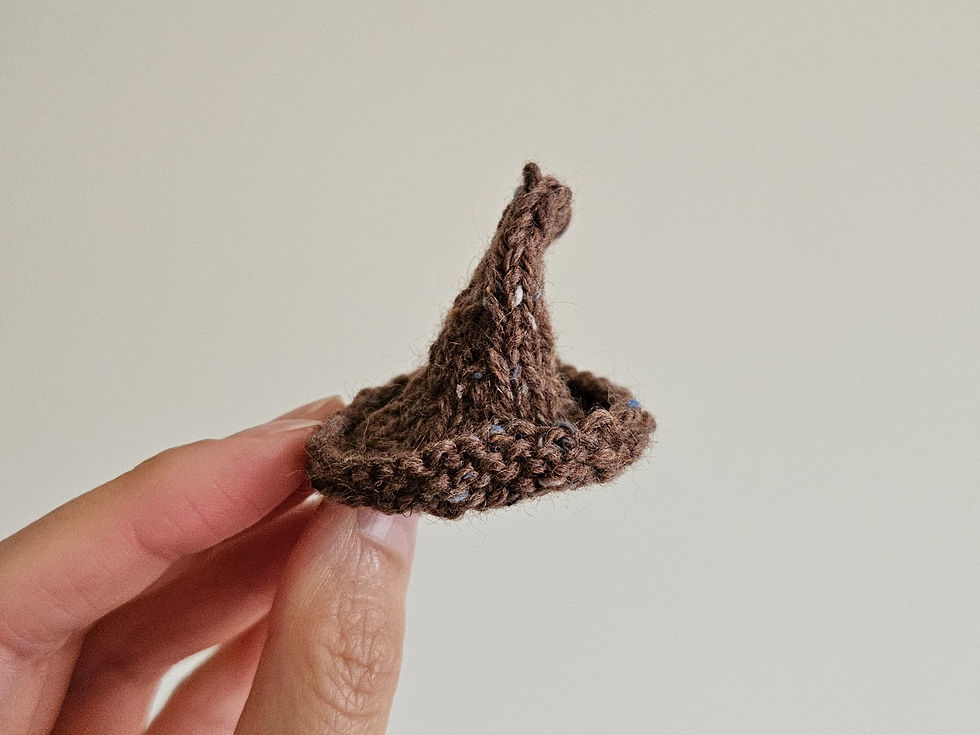
Knitting the witchy hat
Using C4, circular CO 4 sts. Knit in the round.
Rnd 1-2: k 2 rnds.
Rnd 3: [k2, LLI] to end. (6 sts)
Rnd 4-5: k 2 rnds.
Rnd 6: [k3, LLI] to end. (8 sts)
Rnd 7-8: k 2 rnds.
Rnd 9: [k4, LLI] to end. (10 sts)
Rnd 10-11: k 2 rnds.
Rnd 12: [k5, LLI] to end. (12 sts)
Rnd 13-14: k 2 rnds.
Rnd 15: [k2, LLI] to end. (18 sts)
Rnd 16-17: k 2 rnds.
Rnd 18: [k3, LLI] to end. (24 sts)
Rnd 19: knit all sts.
Rnd 20: [k2, LLI] to end. (36 sts)
Rnd 21: knit all sts.
Bind off.
Adding the Leafy Details
Step 1: Wrap green yarn loosely around two fingers several times to form a small bundle of loops. Slide the bundle off your fingers. Tie a separate length of green yarn tightly around the center of the bundle. Secure with a double knot, leaving long tails for attaching.


Step 2: Cut through the loops at both ends, taking care not to cut the attaching tails. Spread out the strands and trim them into a leafy, fan-like shape, leaving the center strands slightly longer than those at the sides.


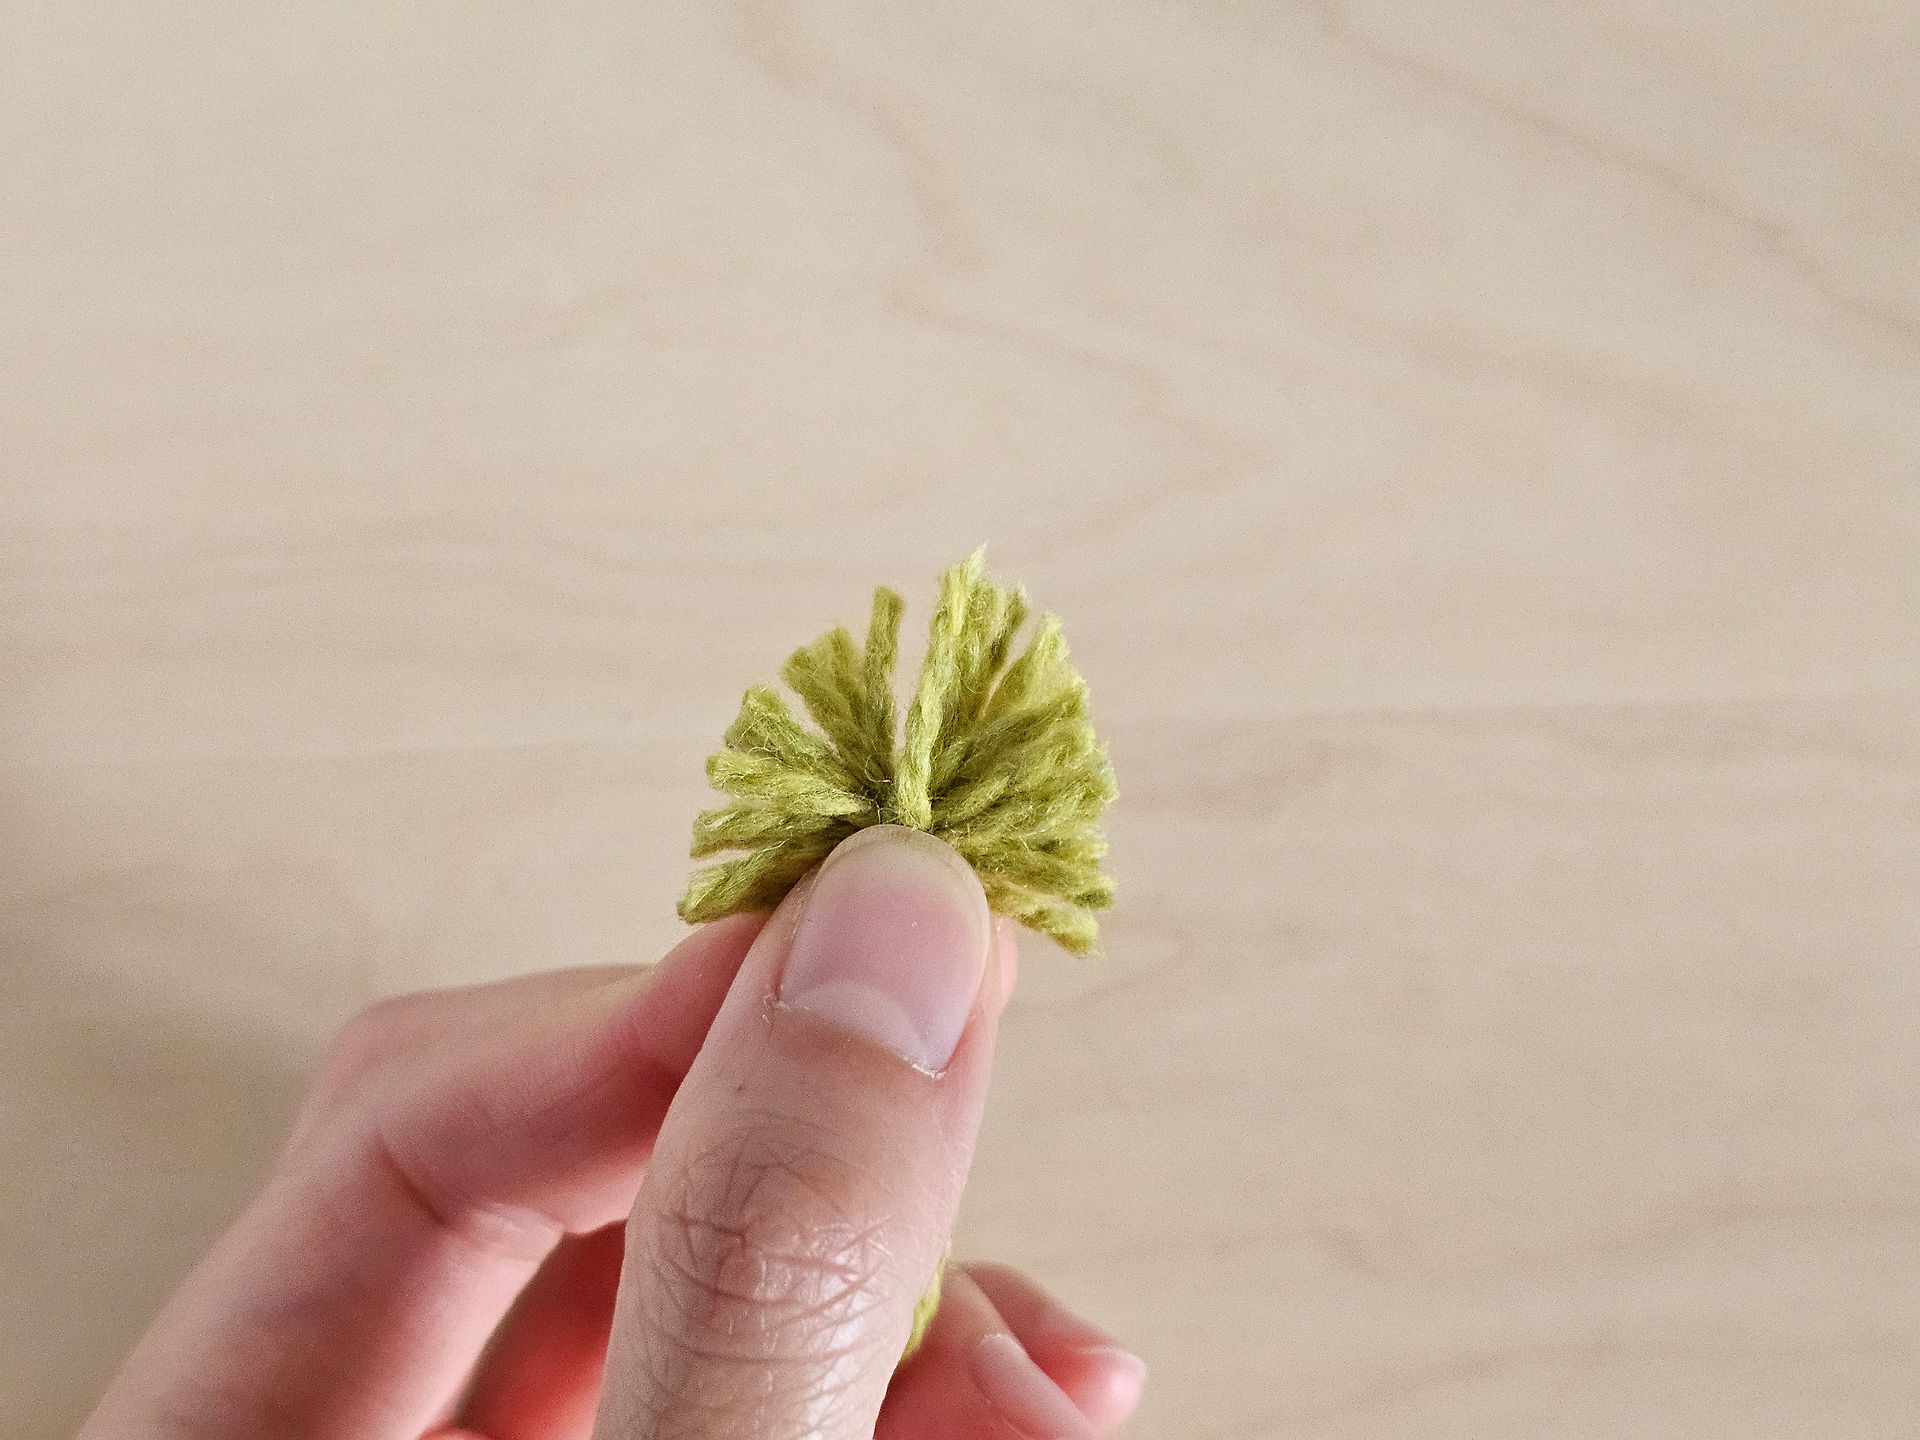
Step 3: Make three leafy tufts. Place the hat on the pumpkin to check the positioning, then use the attaching tails to sew each tuft securely to the underside of the brim, with the strands extending beyond the edge. Secure and weave in the ends.


Follow us for the latest updates and new designs on Instagram: @moumou_knits


Comments