
Free Easter Knitting Pattern: Chicken Chocolate Basket
- 17 avr.
- 4 min de lecture

Knit this adorable Easter chicken basket with a removable lid! This free knitting pattern is perfect for Easter treats, handmade gifts, and spring home decor. A cozy hen sits on top of the basket, making it both cute and functional. Great project for animal lovers and seasonal knitting ideas.
Skill Level
Beginner
Techniques
Circular cast-on
Increase and decrease stitches
Gathered bind-off
Simple embroidery skill
Finished Size
9 cm / 3 ½ in (height)
Needles
US 3 (3.25 mm)
Gauge
26 sts x 37 rows = 4 x 4 in / 10 x 10 cm
Notions
A tapestry needle
Yarn
Estelle Eco Tweed DK - 50% Organic Wool, 25% Organic Alpaca, 25% Cellulosic Viscose (350m / 382 yds - 100 g)
Yarn Amount
Color 1 (Off-white): 5 g
Color 2 (Green): 4 g
Color 3 (Yellow): 5 g
Other Materials
Toy stuffing
Extra yarn or embroidery floss for the face
Abbreviations
CO | cast on | k2tog | knit 2 stitches together |
rnd(s) | round(s) | ssk | slip, slip, and knit |
st(s) | stitch(es) | RLI | right-lifted increase |
k | knit | LLI | left-lifted increase |
p | purl | pso | pass stitch over |
Note - Free Easter Knitting Pattern: Chicken Chocolate Basket
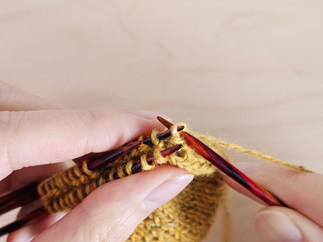
This pattern consists of two parts: a two-color knit basket and a matching chicken lid. Both are worked seamlessly in the round, starting with a circular cast-on and finished with a gathered bind-off.
The chicken is gently stuffed before closing to give it a soft, plump shape. The facial details are added afterward using simple embroidery techniques.
Basket
With Color 1, circular CO 12 sts. Knit in the round.
Rnd 1: knit
Rnd 2: [k2, LLI], repeat [] to end. (18 sts)
Rnd 3: knit
Rnd 4: [k3, LLI], repeat [] to end. (24 sts)
Rnd 5: knit
Rnd 6: [k4, LLI], repeat [] to end. (30 sts)
Rnd 7: knit
Rnd 8: [k5, LLI], repeat [] to end. (36sts)
Rnd 9: knit
Rnd 10: [k6, LLI], repeat [] to end. (42 sts)
Rnd 11: knit
Rnd 12: [k7, LLI], repeat [] to end. (48 sts)
Rnd 13: knit
Rnd 14: [k8, LLI], repeat [] to end. (54 sts)
Rnd 15: knit
Rnd 16: [k9, LLI], repeat [] to end. (60 sts)
Rnd 17-21: k 5 rnds
Rnd 22: [k2tog, k4], repeat [] to end. (50 sts)
Rnd 23-28: k 6 rnds
Rnd 29-36: change to Color 2, k 8 rnds.
Rnd 37: [k2tog, k3], repeat [] to end. (40 sts)
Rnd 38: knit
Rnd 39: [k2tog, k2], repeat [] to end. (30 sts)
Rnd 40: knit
Rnd 41: [k2tog, k1], repeat [] to end. (20 sts)
Rnd 42: knit
Rnd 43: k2tog to end. (10 sts)
Gathered bind-off.

Push the top of the work inward so it forms a basket shape. To secure it, thread the yarn tail on the opposite side of the opening, then weave it around the center, following either the cast-on stitches or the gathered stitches. Pull gently to close and fasten.


Chicken lid
With Color 3, circular CO 12 sts. Knit in the round.
Rnd 1: knit
Rnd 2: [k2, LLI], repeat [] to end. (18 sts)
Rnd 3: knit
Rnd 4: [k3, LLI], repeat [] to end. (24 sts)
Rnd 5: knit
Rnd 6: [k4, LLI], repeat [] to end. (30 sts)
Rnd 7: knit
Rnd 8: [k5, LLI], repeat [] to end. (36sts)
Rnd 9: knit
Rnd 10: [k6, LLI], repeat [] to end. (42 sts)
Rnd 11-18: k 8 rnds
Rnd 19: k2, LLI, k to the last 2 sts, RLI, k2 (44 sts)
Rnd 20: knit
Rnd 21: k2, LLI, k to the last 2 sts, RLI, k2 (46 sts)
Rnd 22: knit
Rnd 23: k2, LLI, k5, ssk, k6, ssk, k12, k2tog, k6, k2tog, k5, RLI, k2 (44 sts)
Rnd 24: knit
Rnd 25: k7, ssk, k5, ssk, k12, k2tog, k5, k2tog, k7 (40 sts)
Rnd 26: knit
Rnd 27: k6, ssk, k4, ssk, k12, k2tog, k4, k2tog, k6 (36 sts)
Rnd 28: knit
Rnd 29: k5, ssk, k3, ssk, k12, k2tog, k3, k2tog, k5 (32 sts)
Rnd 30: knit
Tail Bind-Off: Place the stitches parallel. K2 together through the front and back needles, repeat once more. Pass the first stitch over the second to bind off one stitch. Continue this process until 14 stitches remain on your needle, plus 1 stitch on the working needle.


Next rnd: LLI, k14, LLI, RLI, k1 (18 sts)
Rnd 2: knit
Last rnd: [k2tog, k1], repeat [] to end. (12 sts)
Stuffing and Closing: Before closing, add stuffing to the chicken. Do not overfill, as the body will act as a lid.
Push the bottom inside the body.
Fill the stuffing mainly in the tail and head, with just a light fill around the body.
Work a Gathered Bind-Off to close the opening.
Thread the yarn tail through the inside of the body toward the back, hold it with a small stitch, repeat twice, and secure to maintain the lid shape.


Facial Features:
Comb: Cut a few strands of yarn and attach them to the head using a crochet hook. Trim with scissors to shape as desired.


Eyes: Insert embroidery floss or yarn from the bottom to the eye position, and make a small French knot for each eye. Weave in ends inside the body.
Beak: Make two simple horizontal stitches to represent the beak.


Finished!! Perfect for holding snacks, buttons, or small items on your desk, this little chicken adds a touch of cuteness to your everyday life.


Follow us for the latest updates and new designs on Instagram: @moumou_knits


Commentaires